
01228 791 695
Block Paving & Driveways Carlisle
We install block paving, driveways, patios and paths operating in Carlisle and North Cumbria. Paving is the cornerstone of our business and we have an in-depth understanding of the engineering and craftsmanship required to create a long-lasting pavement.
We take care to properly excavate and prepare the base of the paving and install the surface to the very highest standards. Landform Landscaping provide paving for both vehicular and pedestrian traffic in a range of media.There’s an outline of the techniques we use at the bottom of the page. All of our work is guaranteed against workmanship defects for 2 years. If you’d like a free quote click the + to message, ring or email us.
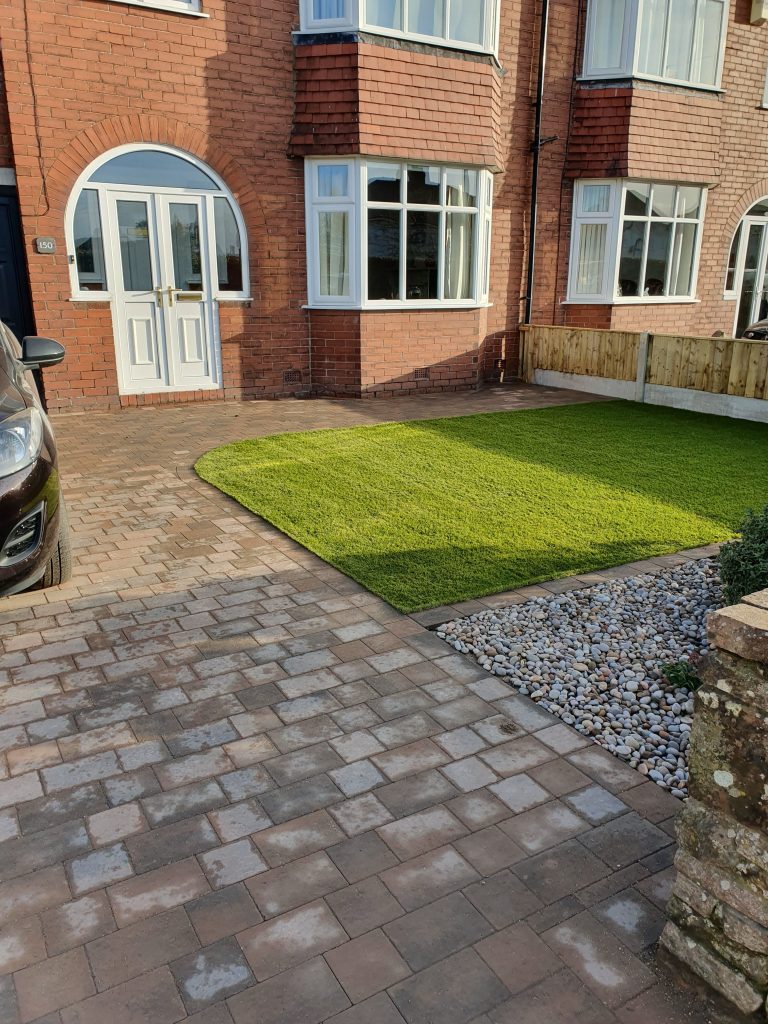
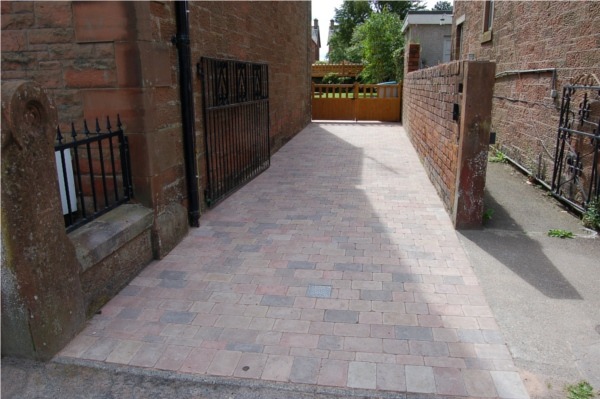
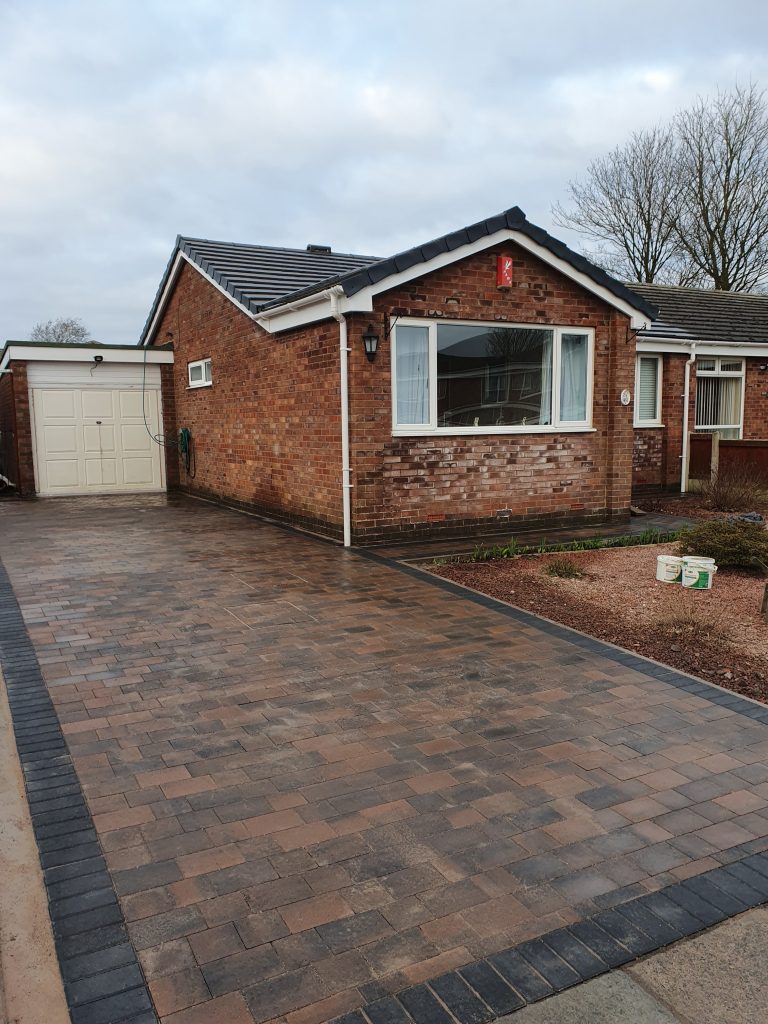
RECENT DRIVEWAY PROJECTS
Why choose Landform Landscaping?
At Landform Landscaping we take pride in our work, not only in what you can see but what is beneath the surface. We always ensure that our work is up to current building regs and that the finished product is going to last:
Our driveways are installed on a fully compacted MOT type 1 subbase foundation. Technical specs say a minimum of 200mm compacted subbase must be used as the foundation. We Excavate our driveways to a minimum of 300mm and often exceed this depth if conditions call for it.
Block Paving Installation Guide
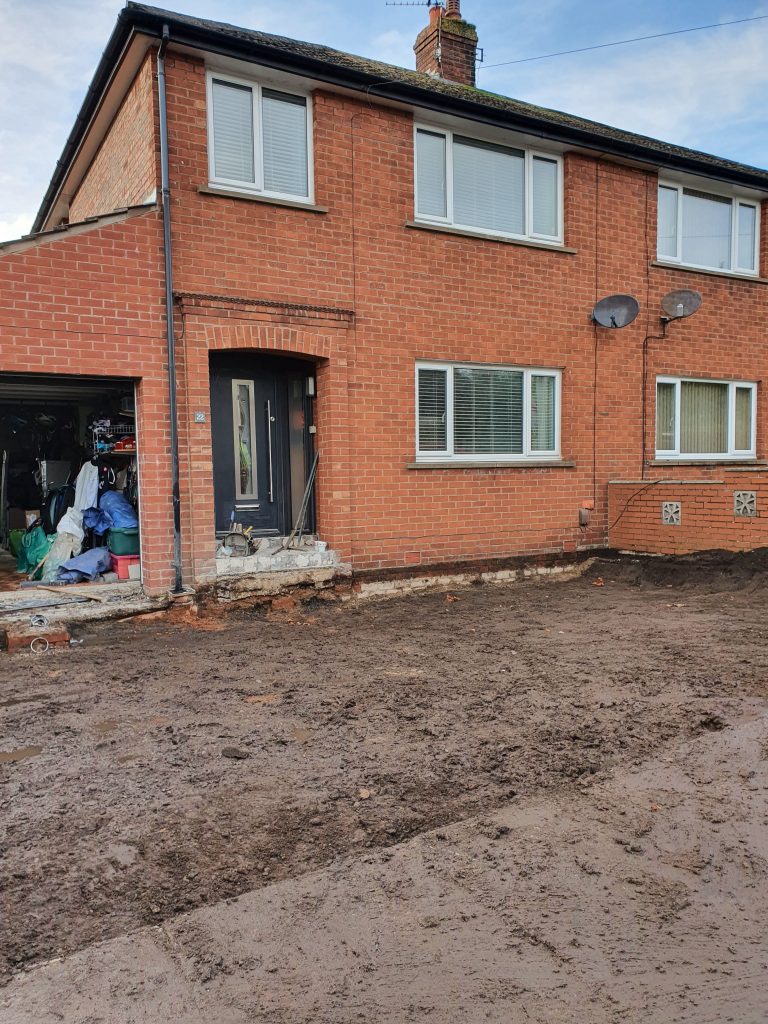
Excavate the area
The absolute key to a successful and lasting driveway is thorough preparation. The bulk of the cost of the job is in the correct excavation and creation of the sub surface. Our driveways are excavated to a minimum of 300mm and include a permeable geotextile.
It’s good practice to prepare remove the topsoil layer and leave the subgrade undisturbed and even.
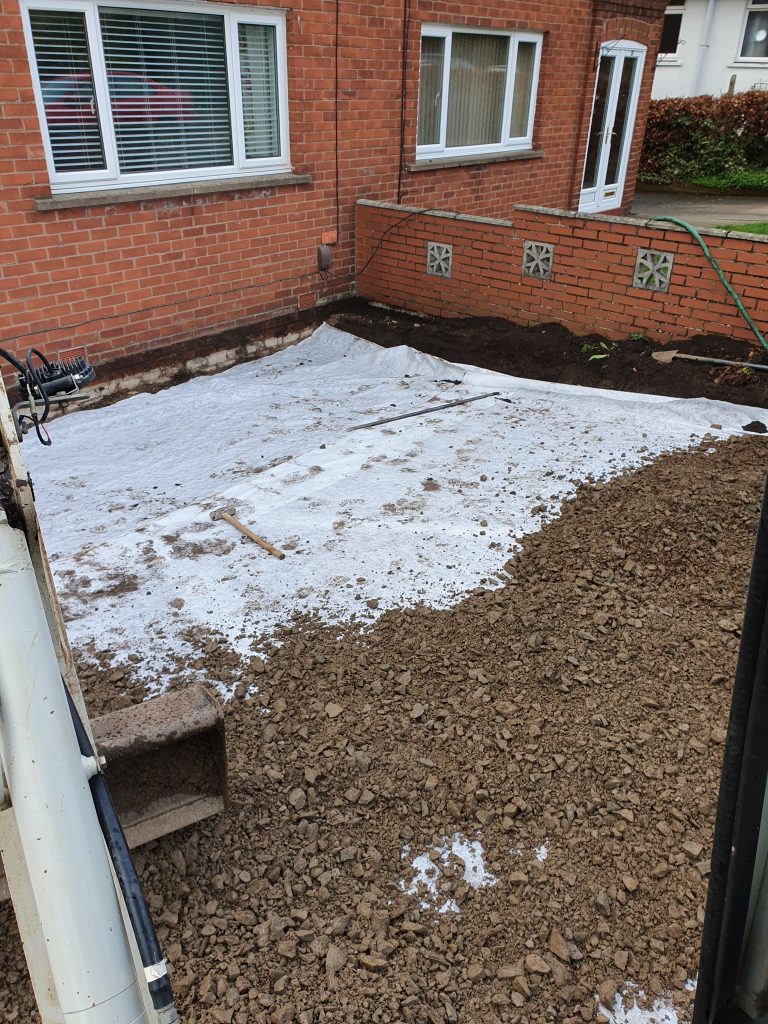
Geotextile on Subgrade
Geotextile is a felted fabric with a roughened surface that’s difficult to puncture and has a high tensile strength. Use prevents the subbase material migrating into the subsoil and allows point loads to be spread over a greater area. Think of a trampoline – the person on the trampoline is effectively suspended by the springs around the perimeter. A geotextile allows loads to be transferred laterally with the weight of the subbase and paving anchoring the edges of the fabric.
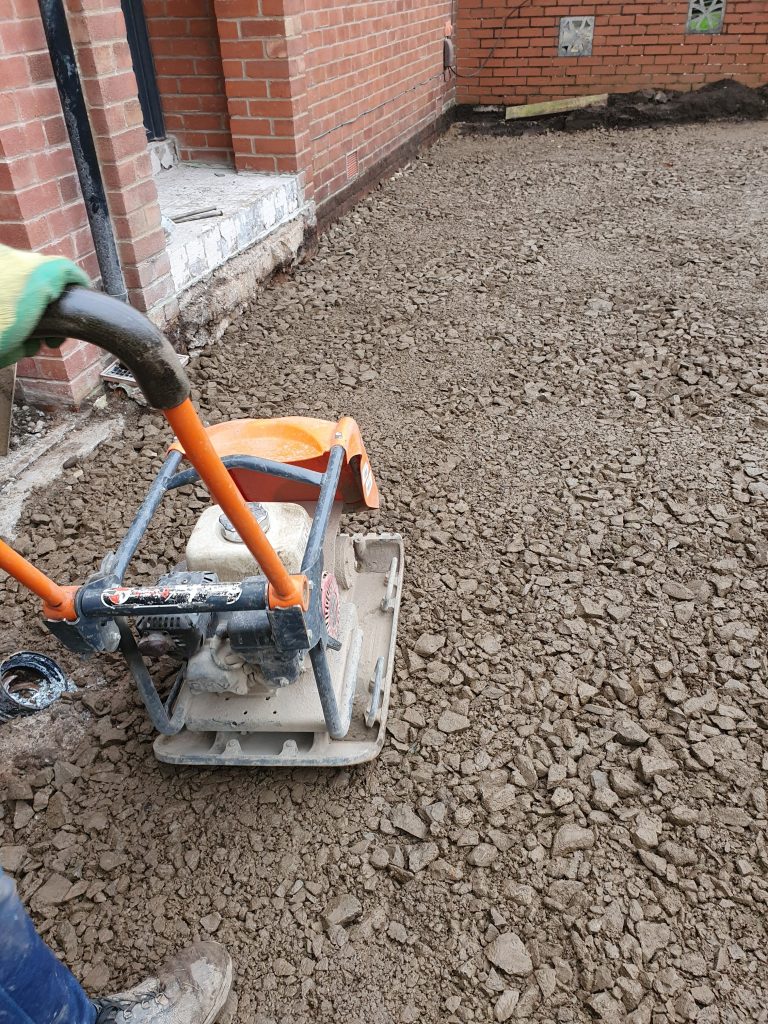
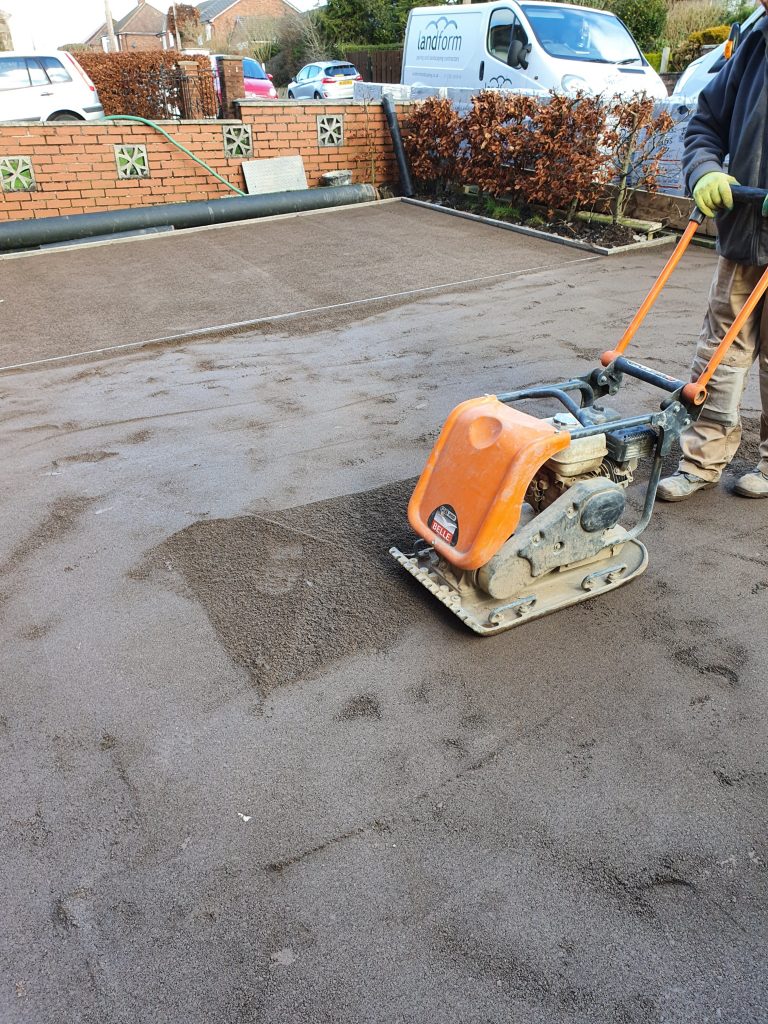
Compaction
MOT type 1 subbase is placed above the geotextile in layers of 100-150mm, properly compacted and layered up to final grade. Full compaction of the subbase is critical, a quick whack with a plate compactor won’t do, it needs to be given alternating passes widthways and lengthways, around 9 passes per layer. This takes time and is often overlooked or neglected. At landform we take time to do this properly and go the extra mile to ensure we produce a quality product. If you’d like to read more about the technical aspects of paving visit the paving expert website.
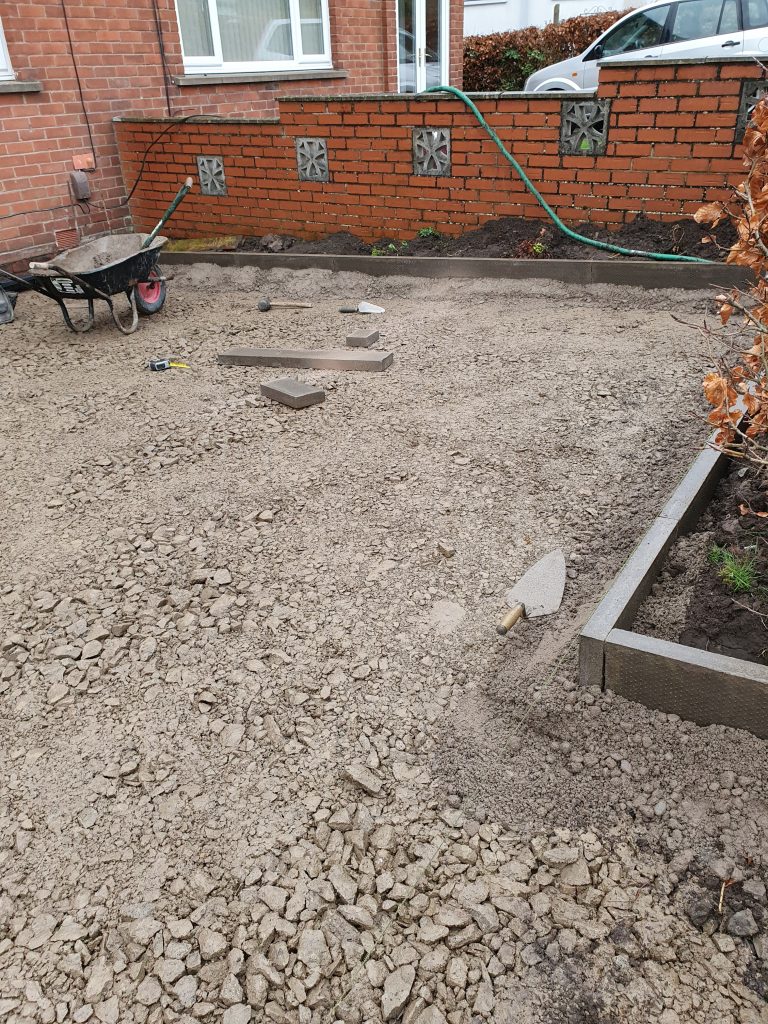
Edge Restraint
Block paving needs proper edge restraint to prevent the blocks moving laterally under load. Kerbs are installed and properly hauched with concrete to give a robust and stable edge. The photo shows the first layer of compacted subbase and pin kerbs installed. With the weather in Carlisle being so wet it makes sense to place a layer of subabse as a dry working platform for the groundworks, it save a lot of slipping around and preventss the subgrade being churned up.
Second layer of subbase
With the edge installed it’s time to install the second layer of subbase. It should be 80mm below finished paved level allowing for a 50mm thick block and 30mm of sand. This subbase layer needs to follow the final profile of the paving within a tolerance of 10mm.
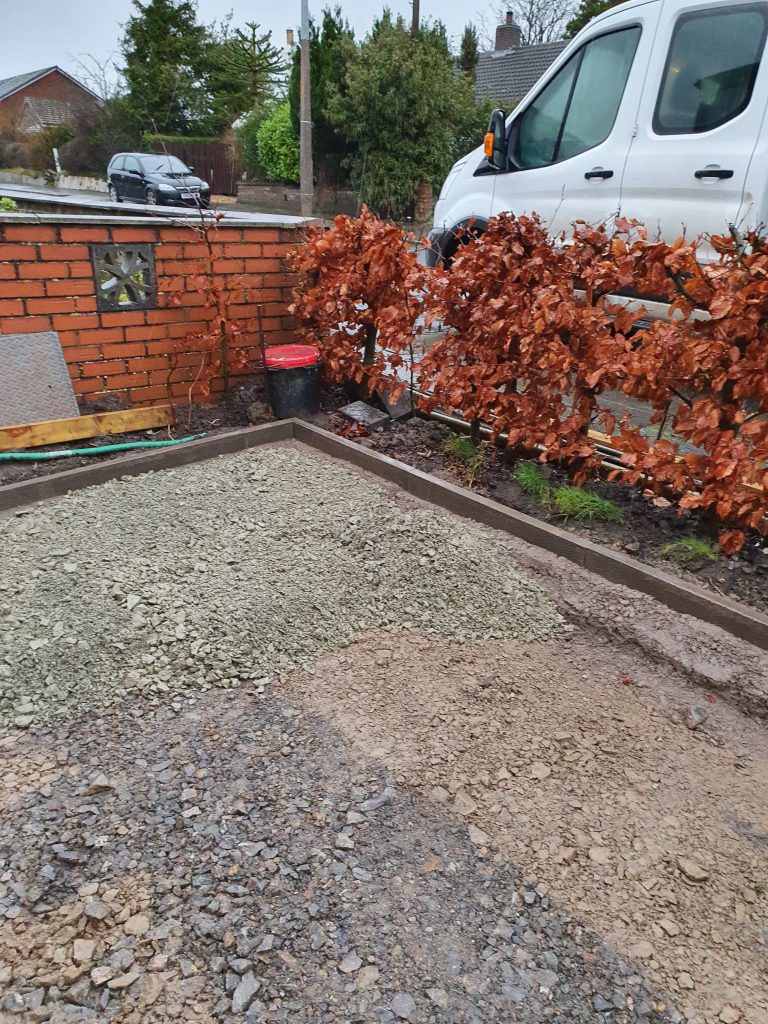
Blinding the subbase
With the subbase graded to the finished profile the next step is to ‘blind’ the top with a thin layer of sand. Any particularly open parts should be thorughly blinded,areas of subbase that don’t contain many fines will have large gaps between the rocks, fill them now to prevent the finsished sand layer sinking in to these spaces over time and prevent settlement. The layer is given a pass with the plate compactor and any patchy areas topped up and re-compacted.
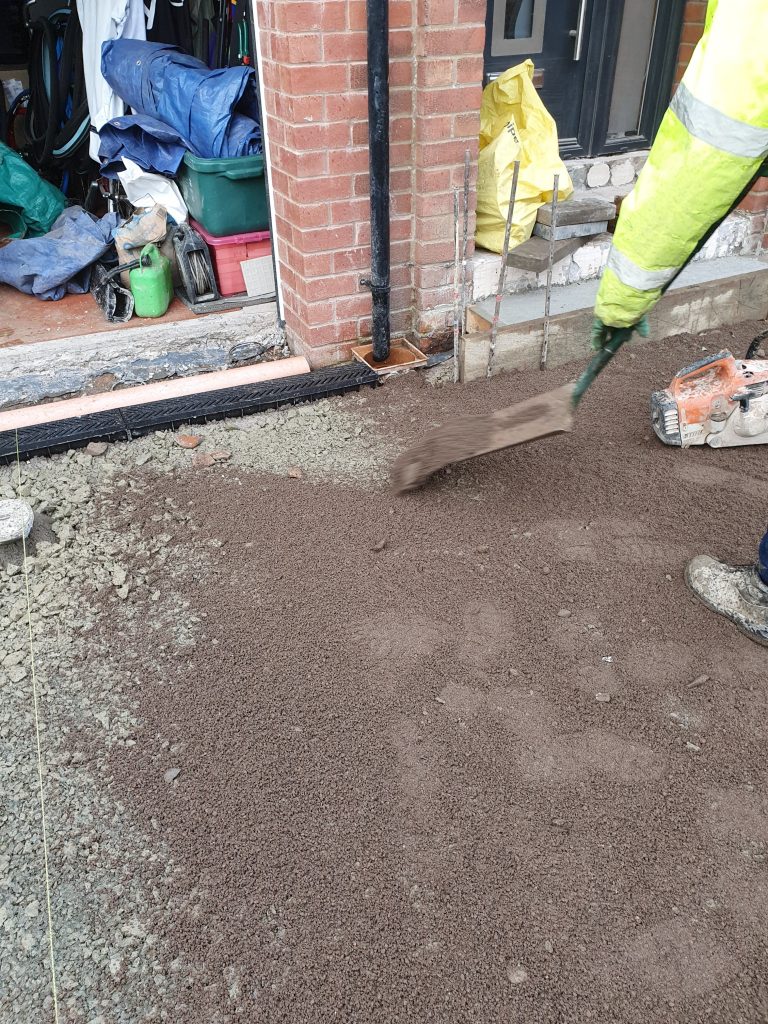
Bedding Layer
A coarse grit sand is placed above the top layer of subbase and given a single pass with the plate compactor. The idea is that the sand is compacted evenly but leaving a little give for final compaction after the blocks have been laid. Areas such as tight corners and nooks that can’t be compacted with the machine can be hand compacted with a podger!

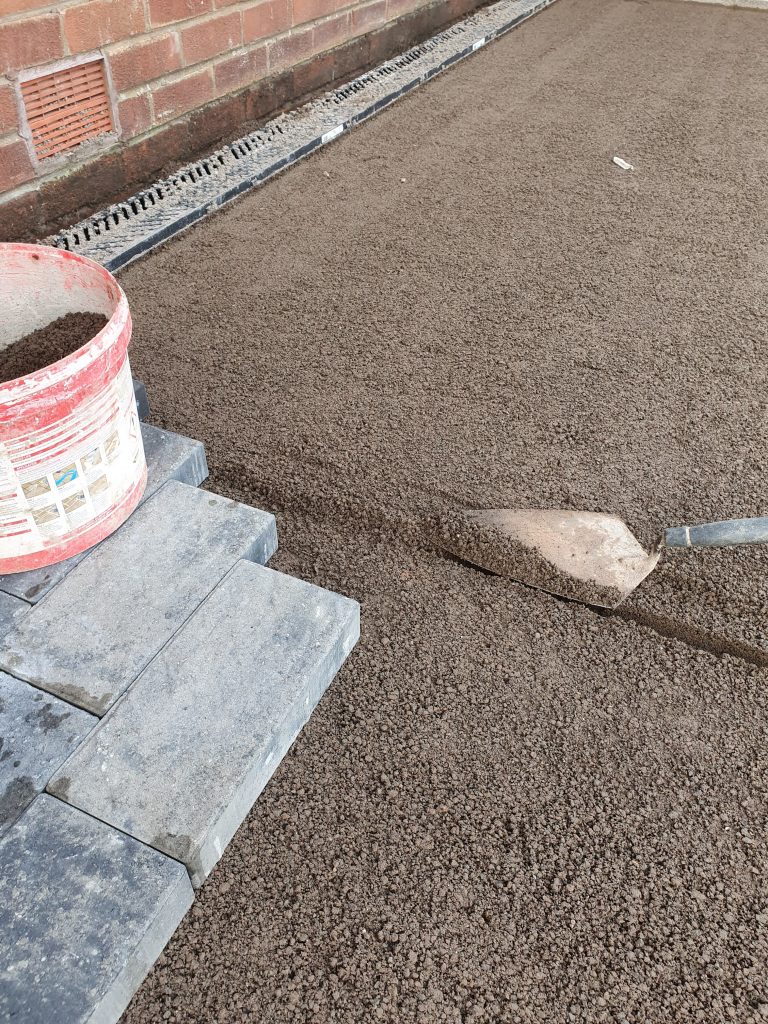
Screeding
The final profile of the pavement is formed by the sand the blocks rest on. Steel bars are set in the sand and positioned a block thickness below a taught string line. Since the blocks will settle after compaction the string line must be set higher than the final level using spacers. In this instance the pavement will drain into the channel drain so the level is set a few mm higher than usual to ensure the pavement is slightly higher than the drain. A straight edge is then pulled along a pair of bars to remove the excess sand giving a perfectly smooth surface.
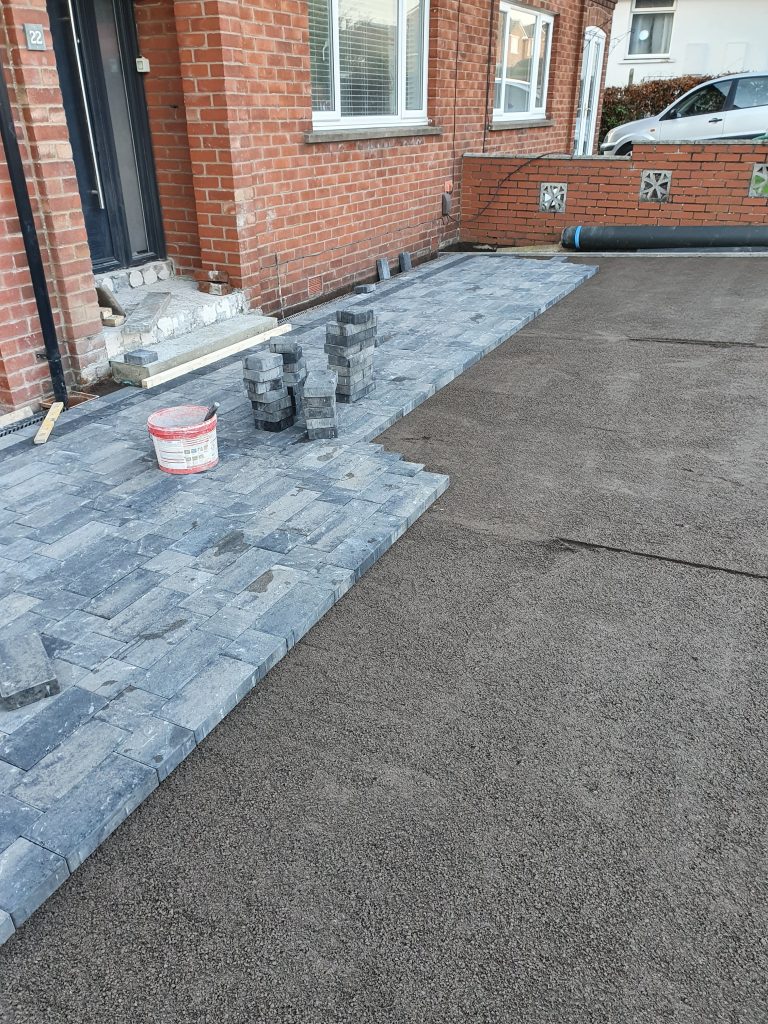
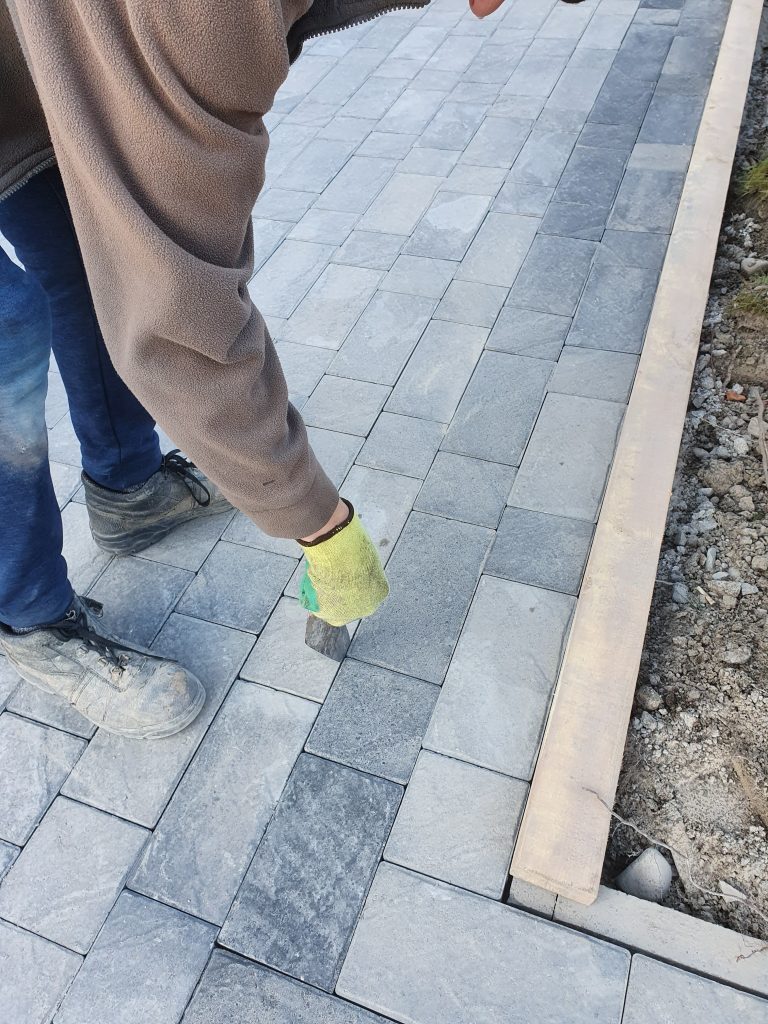
Laying the blocks
The blocks on this drive are two size riven effect block by Lakeland pavers in Penrith. This block lends itself to a coursed layout, to keep things neat a string line can be set up for the first course or you can work from your existing wall or drainage channel. Check for straightness every few courses and correct as necessary. Remove the screed bars and fill in the voids as you reach them.
Laying Pattern
These two-sized blocks come in packs of even quantities and can be laid random, or in a bond. Here we’ve got the bond running diagonally through the pavement. They can also be laid with an alternating bond – It’s a matter of personal preferance and taste. Whichever you choose I do think it looks more pleasing to avoid mathcing joints from one course to the next.

Cutting
With the bulk of the driveway laid it’s time to cut in. Any reject blocks can be swapped out with good blocks from the edge to be cut to avoid wastage. A block splitter or masonary is used to trim the edge. To keep the cut line straight the cuts should be marked in one go using a straight edge – the timber batten used for screeding comes in very handy for this. If using a power saw the blade can be run along the wooden edge to give a perfectly straight line. Pop a few blocks on the toothed edge to increase stability while you cut and prevent individual blocks spinning or drifting out during the cut.
Inlays and details
With the edges cut the header courses and inlay details can be inserted. Allow a few mm extra on the cut edge to give a little wiggle room. The pattern can be checked and adjusted with a trowel and the entire pavement should be snagged for cracked or damaged blocks. Hopefully you’ll find all the snags before the sand goes in…
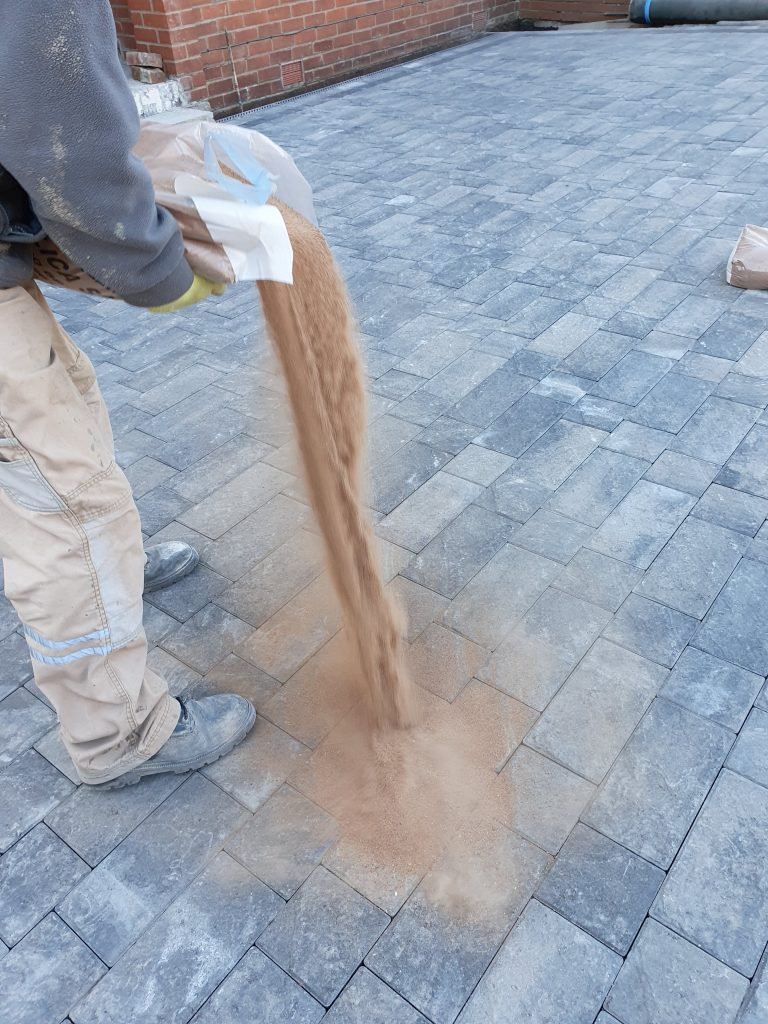
Silica Sand
The blocks are held in place by a grout of very fine sand, it’s poured over the paving and brushed in using a wide broom. The surface of the blocks must be absolutely dry in order for the sand to properly flow into the joint. Check for damaged blocks as you go – you might have missed one
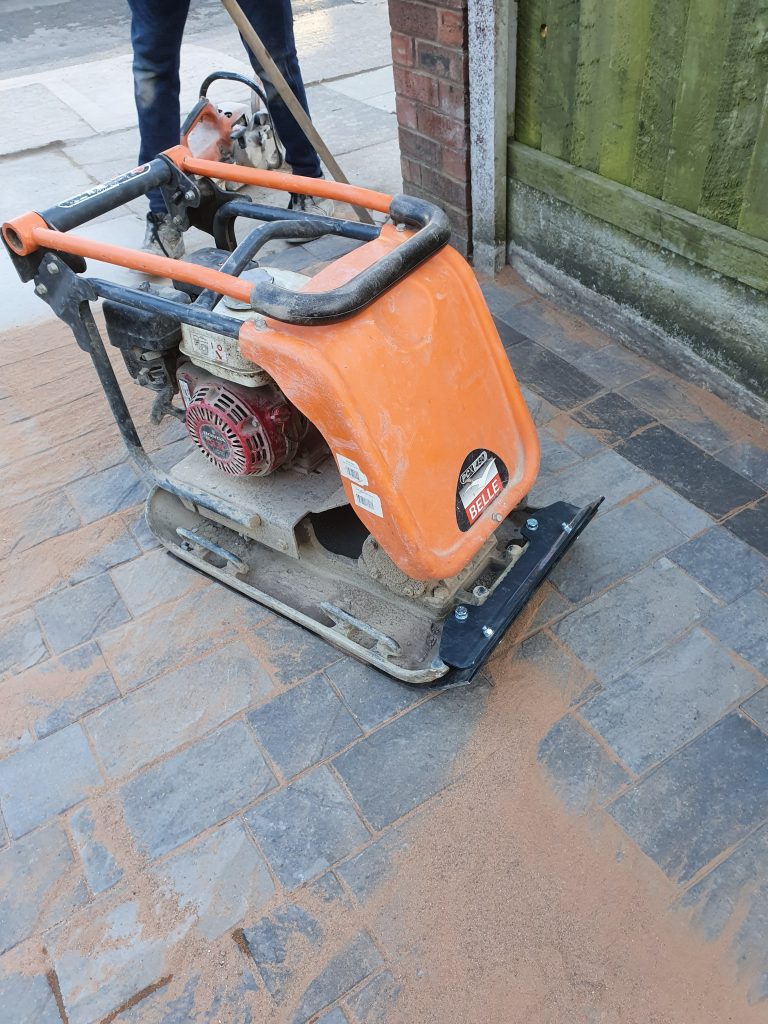
Final compaction
After brushing in the dried sand the blocks must be vibrated using a plate compactor. The blocks will drive into the bedding layer a feww mm and firmly lock into position. These riven blocks have ridges that would be marred by the steel plate so the machine is fitted with a protective rubber mat. Sweep any excess sand away from the path of the machine as you go to prevent the sand scouring the surface. A couple of passes topping up the joint as you go and the pavement will be ready for traffic.
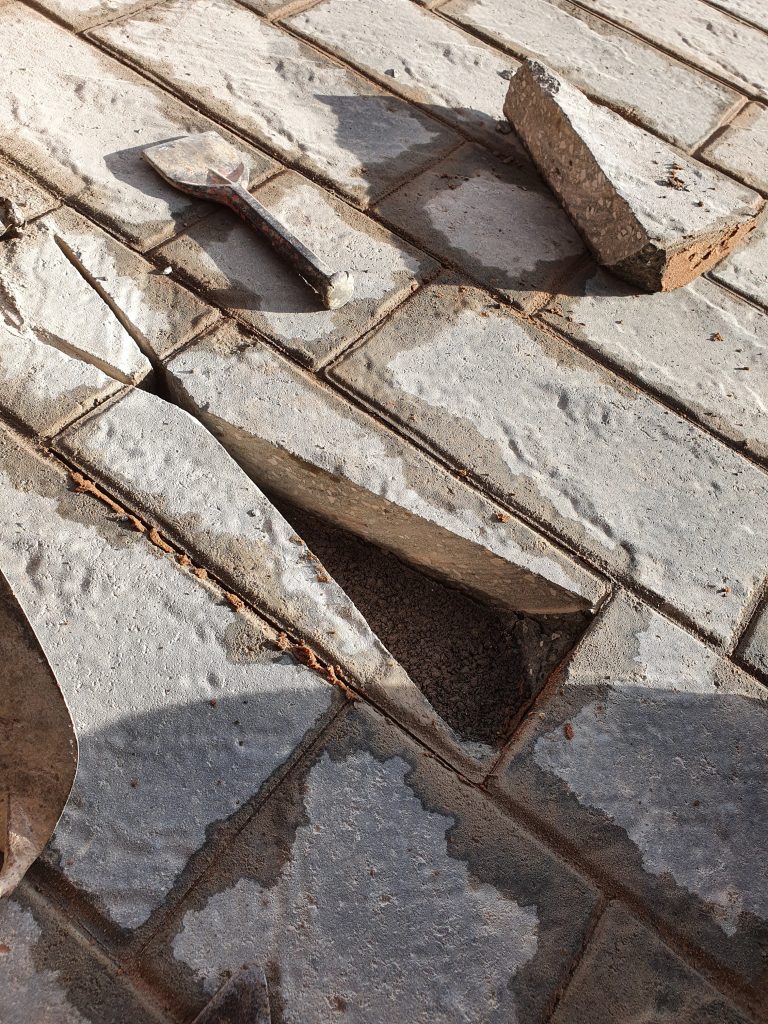
Snagging
Things go wrong, mistakes get made – it happens. What sets apart a good contractor from a bad one is their attitude to mistakes. At Landform Landscaping we understand that things go wrong and we put them right. After inspecting the pavement we might find a damaged block – it’s a one in a thousand chance but with 3000 blocks the odds are good there’s one or two. Those blocks aren’t coming oit without a fight. Cut a diagonal through them and chisel them out. Replace with fresh blocks, add a little kiln dried sand and tap into position with a rubber mallet. Job done.
Local Expertise
Subsoil conditions in the Carlisle area are mostly a stable glacial clay. The topsoil is usually a heavy clay soil and is highly compressible in nature. Complete removal of this topsoil layer ensures a stable foundation for the wearing course. In the Carlisle area the topsoil runs about 300-350mm deep. It isn’t much more work to completely remove the topsoil layer and to me it makes no sense not to .
Different conditions occur in places like Brampton and the villages that run adjacent the Pennines toward Penrith. There’s a band of sand and free draining topsoil that runs along the Eden valley. It’s best practice to remove the topsoil here and avoid disturbing the sandy subsoil that makes for an excellent subgrade but a minimum of 200mm of subbase should still be used to transmit the point loading of the vehicle to a wider area.