
01228 791 695
Decking Carlisle
Here’s some recent images of decking we’ve built in the Carlisle area. Decking is great for creating a flush area to extend your living space or to stand alone, particularly over a sloping site. We build our decks using pressure treated timber and take great care to ensure that the frame is designed correctly and built to last.
There’s an outline of the techniques we use at the bottom of the page. All of our work is guaranteed against workmanship defects for 2 years. If you’d like a free quote click the + to message, ring or email us.
RECENT DECKING PROJECTS WE’VE BUILT IN THE CARLISLE AREA
Why choose Landform Landscaping to build your decking
We always do a good job. We are completely upfront and honest with our customers, we won’t overcharge you or add any hidden extras and we guarantee all of our work.
A passion for learning, experience and eye for detail means that our work is always as technically competent as it can be. We keep up to date with current best practices and always pursue high standards of workmanship.
More examples of our decking in Carlisle
Quality Composite Decking Carlisle
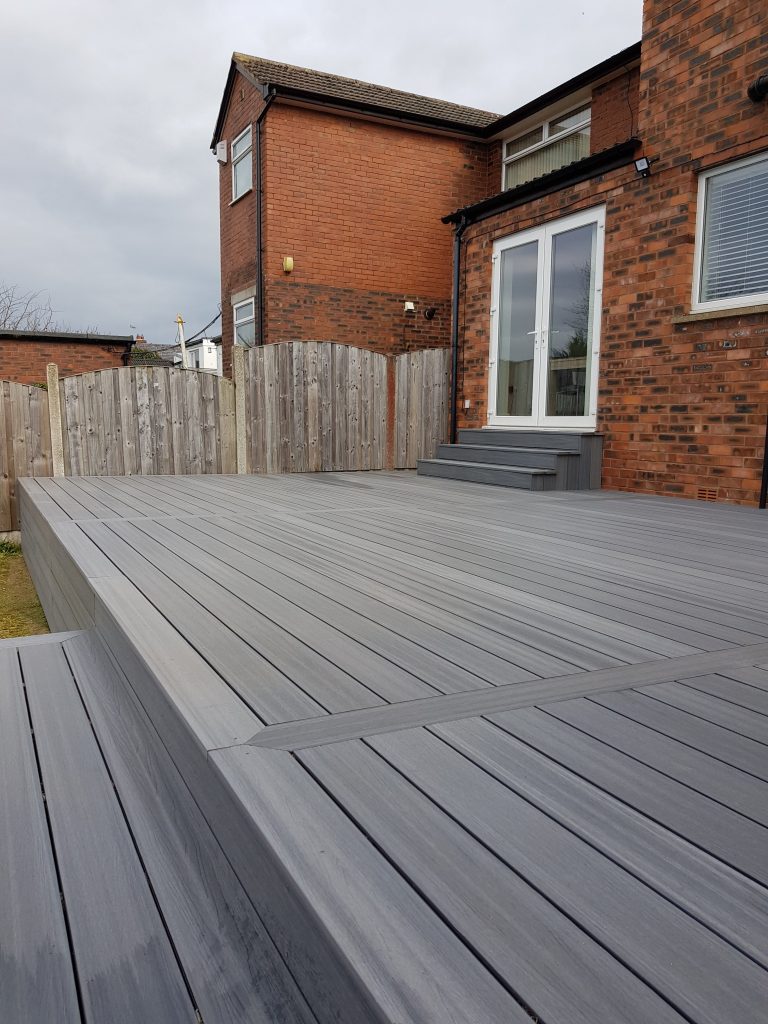
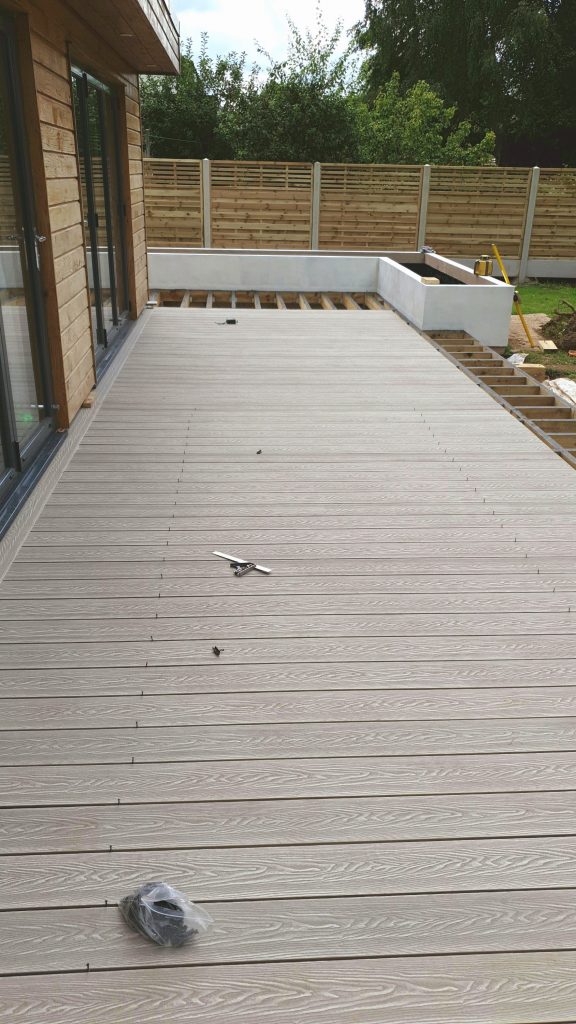
This Deck we built on Beck Road in Carlisle was wider than a single board length so to keep the lines clean and avoid wasting costly materials we laid out the boards in three sections with a picture frame around each part.
The boards were supplied by Andersons Carlisle and manufactured by Newtechwood Ultrasheild.
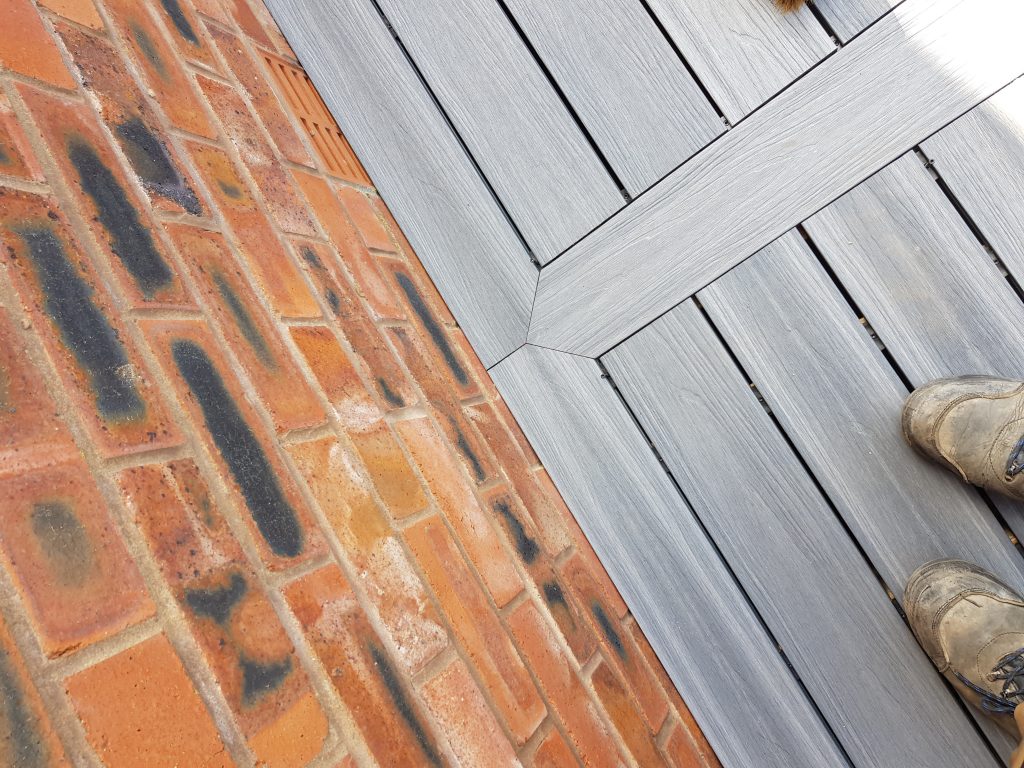
Important little details
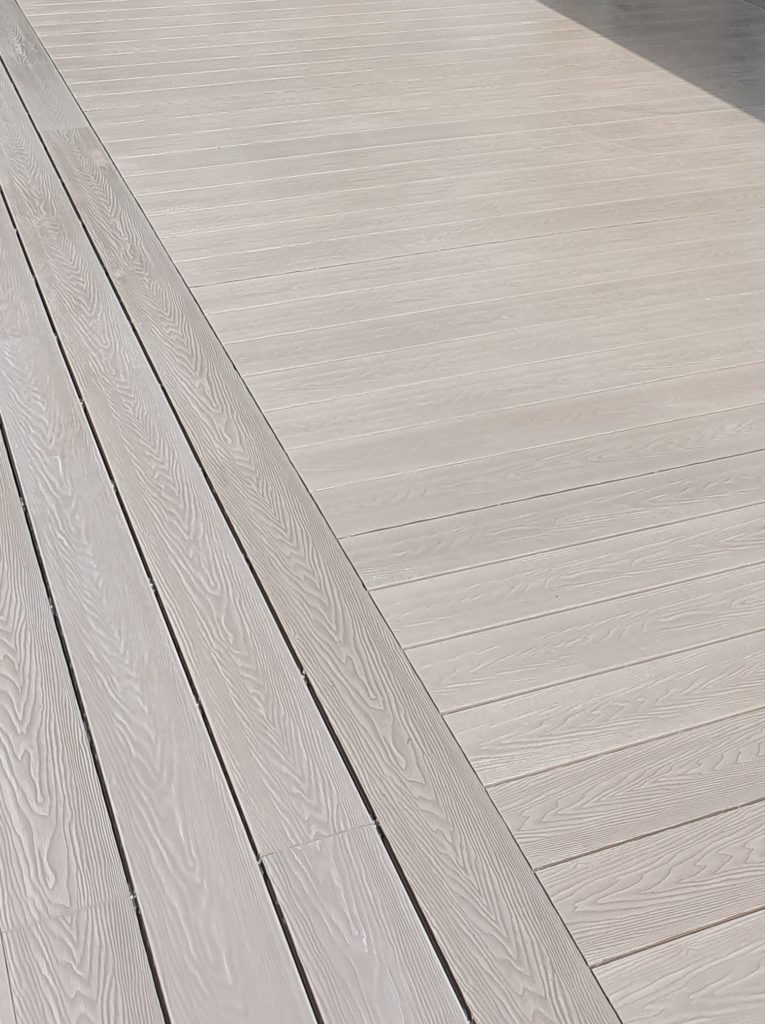
There’s a lot going on in this photo – yes I forgot to polish my boots but lets overlook that fact and pay attention to the details: Hidden fasteners – no ugly screws showing in your deck surface. Mitred corners on the picture frame around the deck. Correct spacing between boards for good airflow and to allow for expansion and drainage. 3mm gap at the board end to allow for longitudinal expansion…is the other guy doing these things?
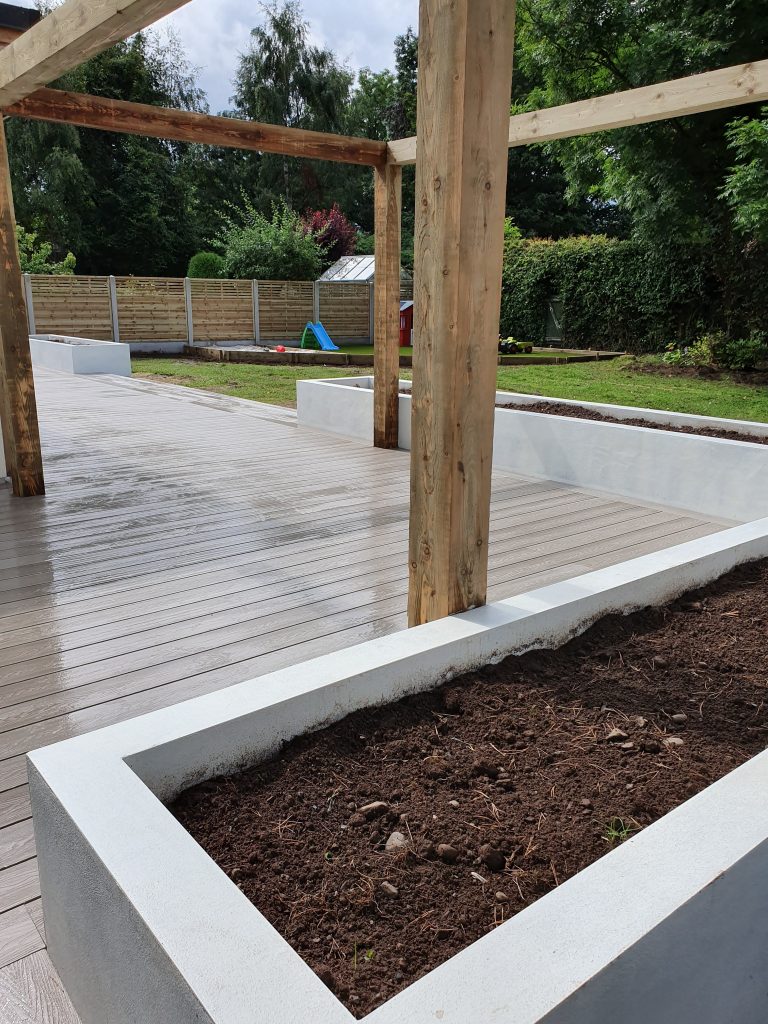
Good Design
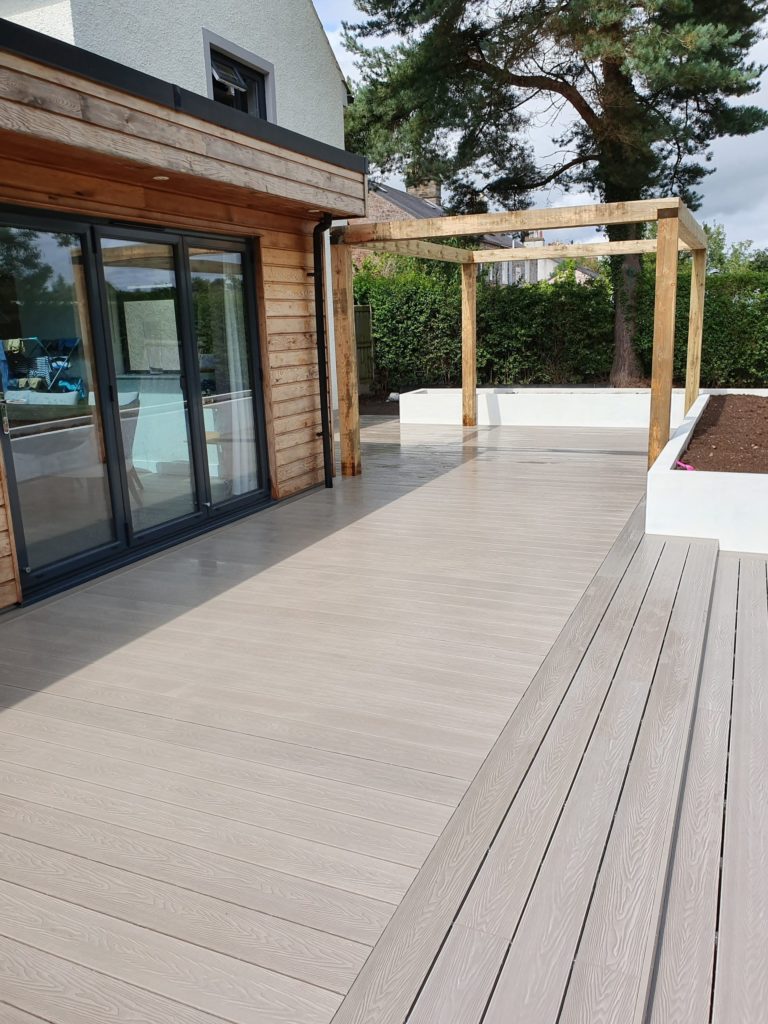
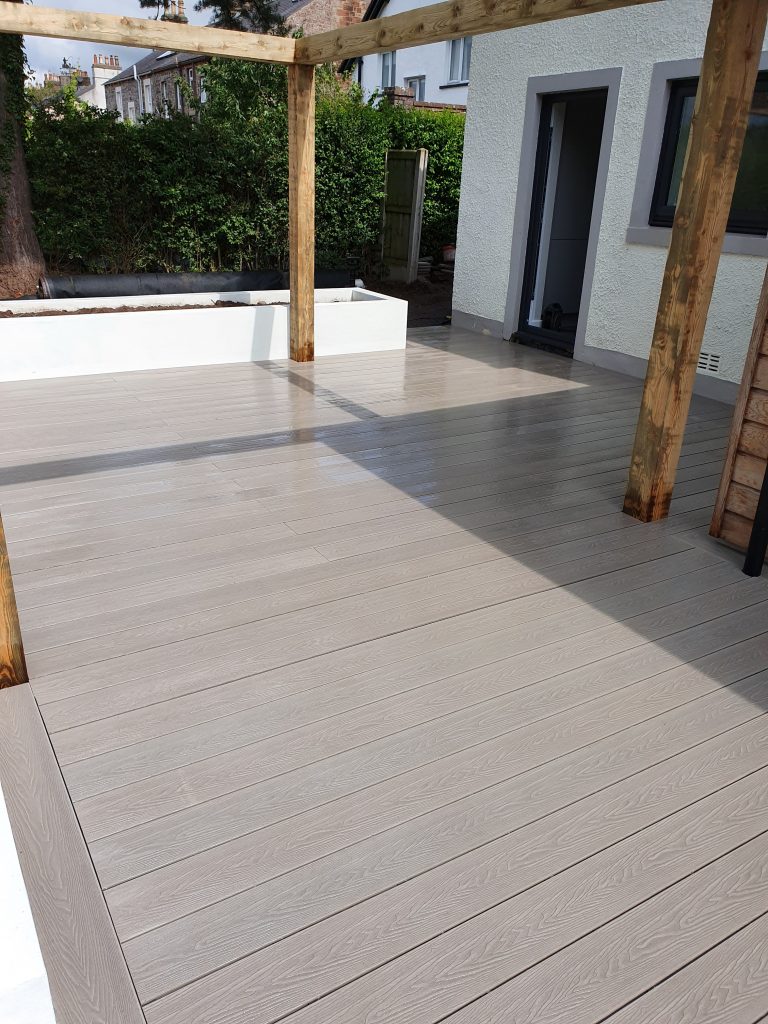
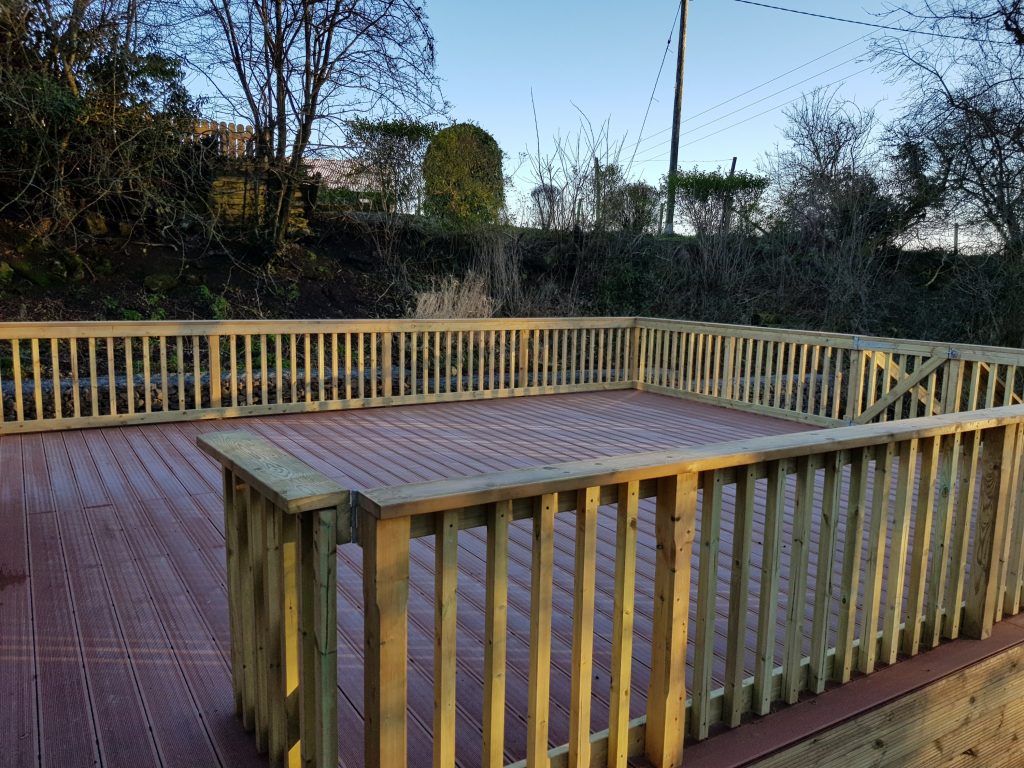
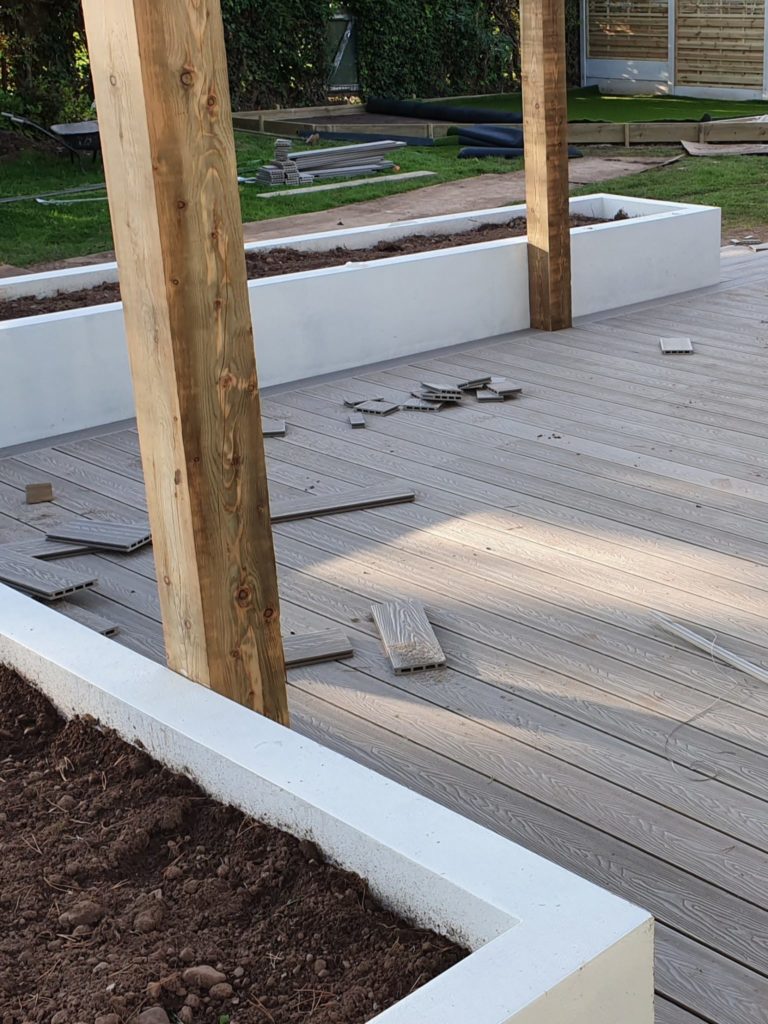
Planters complete the look on this modern deck we built in Dalston Cumbria. The full width deck creating a living space flush with the interior of the building. Bi-fold doors opened onto a 400mm drop meaning that a patio would be three steps beneath the internal level, awkward for a patio but giving the perfect site for a deck.
The planters gave an opportunity to safely enclose the area and create an additional element for interest. A pergola adds height and structure. The composite decking used here was supplied by Dino decking – a cost-effective but very attractive and durable product.
How we build our Decking
We build our decks using a concrete pier footing system. The advantage of this method is frost-heave stability and it eliminates any timber contact with the ground. Pier footings significantly improve the lifespan of the deck. Using pressure treated timber on the frame means the deck is more resistant to fungal attack. Proper airflow allows the frame the opportunity to dry. Correct spacing of the decking boards is critical too, a 5mm gap allows for expansion width ways and for drainage and ventialtion of the frame. Boards must also have a gap of 3mm or more on the lengths to allow for thermal expansion.
HOW TO BUILD A DECK

IS THE SITE SUITABLE
The first thing to consider before you commit to build a deck is the location. Decking needs a robust, stiff frame with good airflow around it and the site needs to have room to accommodate this: In lean-to positions where a patio would be impractical such as adjacent a building with floor levels significantly higher than ground level or where the garden dramatically slopes away from the building. Free standing decks can be built anywhere, usually to take advantage of a view or to gather the evening sun but bear in mind that the deck might be a foot or more above the current ground level – will you or your neighbours have their privacy compromised?
LEAN-TO DECKS AGAINST A WALL
Most commonly decks are built against the house wall with access from patio or other doors . You will need at least 150mm ground clearance to accommodate the frame for any deck – that’s two brick courses or more but consideration must also be given to the position of the building’s damp proof course and the implications of building a deck that could potentially cause damp from rain splashing above the dpc. It’s worth noting that decking needs a robust frame with a clearance at least equal to the thickness of the deck board and supporting timbers. Practically this means at least 6 inches or 150mm. Timbers less than 4 or 5 inches deep don’t make for great deck frames because they flex and need closely spaced supports. These constraints can be overcome by the use of stiffer framing materials such as aluminium or steel but will increase cost.
PATIO DOORS & DECKING
The current trend for bi-fold and patio doors aims to give a light and airy interior space looking out onto the garden. When the outside ground level is low ( e.g. more than a couple of steps down or if the the garden slopes away) a deck is often a better choice than paving particularly if prevailing site conditions mean building up ground level is impractical. If you’re considering having an extension built or bi-folds installed in an existing building be aware that specialist cills and thresholds are available that allow a flush exterior surface. If you’re having a new extension or building your architect/builder will be able to design the building to accommodate this. Here’s a link to a youtube video about flush thresholds for bi-folds.
It should be noted that the height of the DPC in your building will govern the finished height of your deck – building regs recommend not to pave or build a deck within 150mm vertical displacement of the Damp proof course, primarily because puddling/splashing can breach the level of the DPC and potentially cause damp issues. I’ve seen many instances where decking has been built inside these limits and has caused no significant issues. I’ve also seen many patios built closer than 150mm to dpc without problems where drainage is good (usually with falls away from the wall) but it’s not recommended. There are exceptions in new builds for flush disabled access where special measures have been implemented in the design and construction of the building but older properties may not have been designed to allow this.
Air bricks must also not be covered or blocked, if your frame needs to cross an air-brick ensure you do not restrict the airflow into the building. Offset the ledger from the wall and take additional measures to ventialte the airbrick.
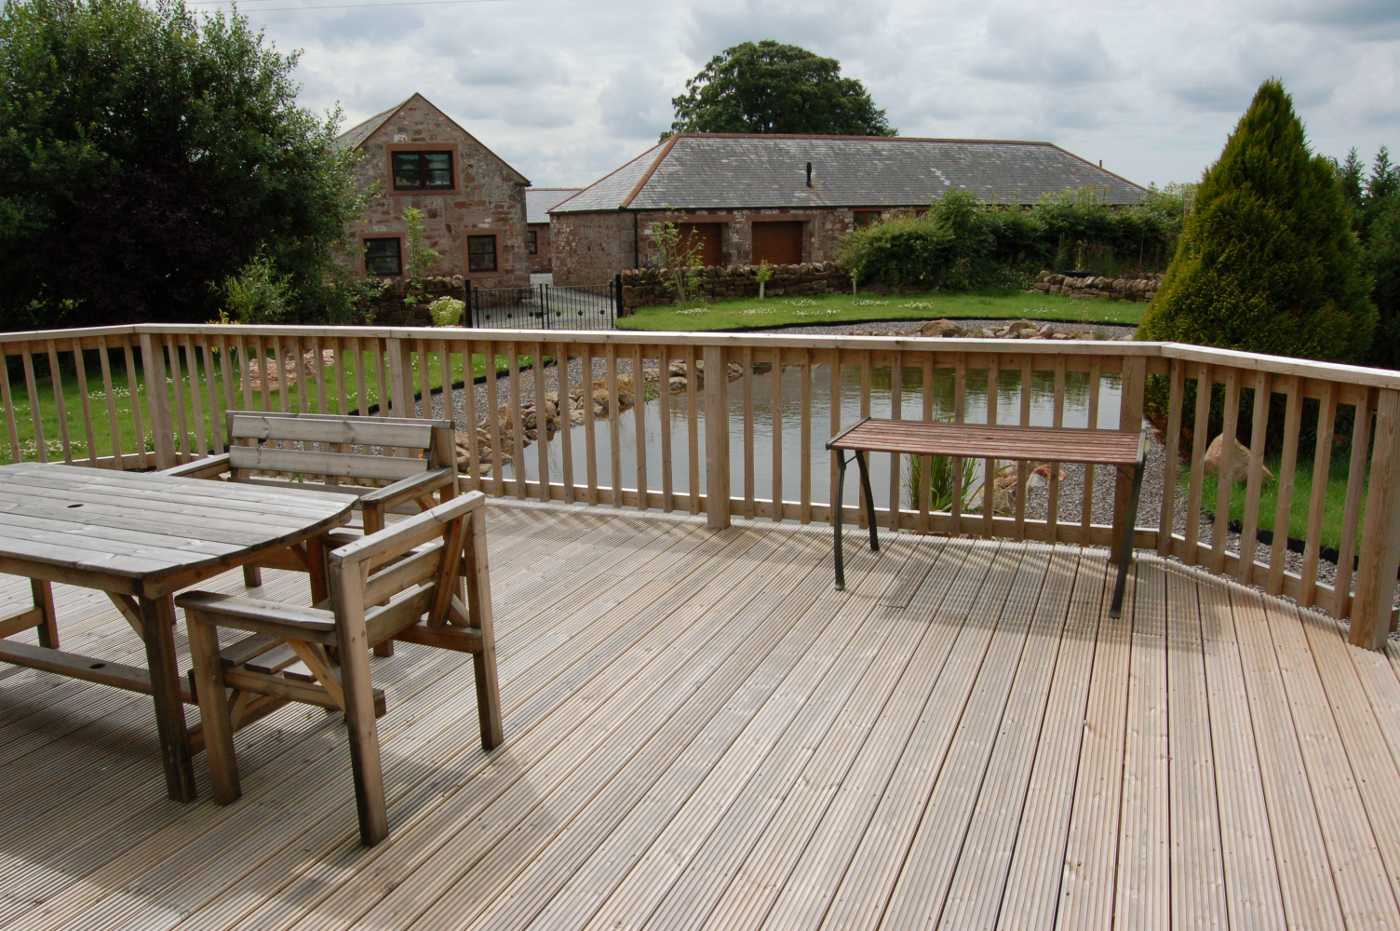
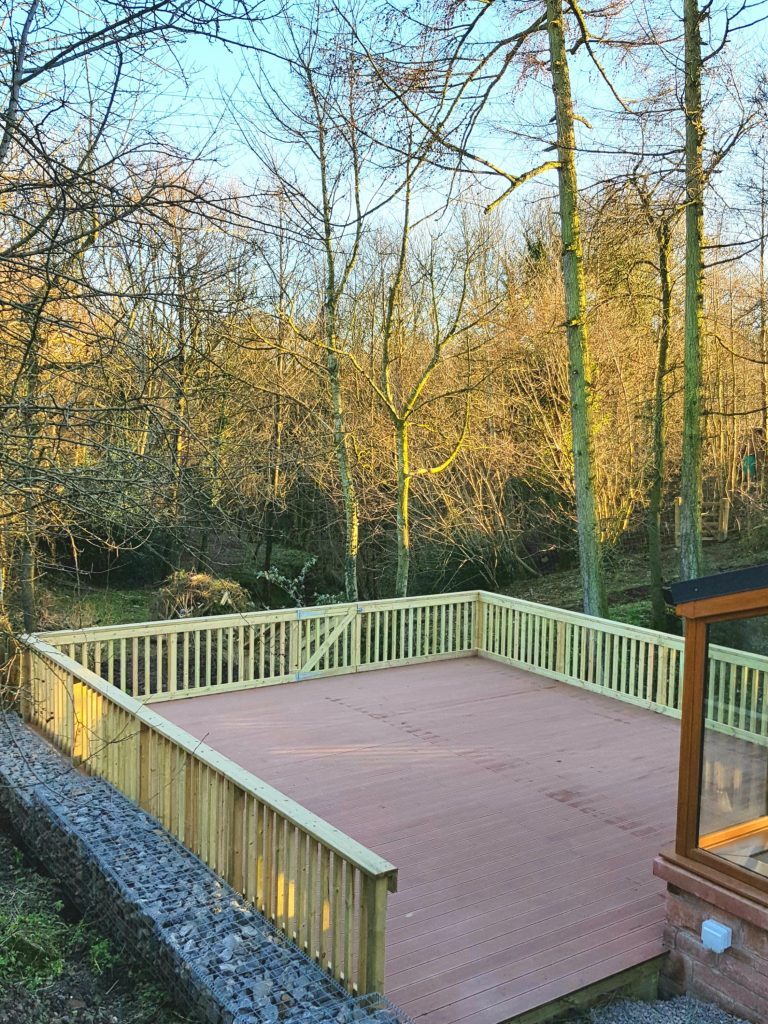
FREE STANDING DECKS
By free standing decks I mean decks that stand on their own, discreet foundation and are not attached to a building for support. The same rules apply when considering the site. We’re often asked to deck a sunny corner of the garden. If the site is level or overlooked it is usually a better idea to install a patio since a deck must be elevated to accommodate the frame and when standing you may be higher than the boundary fence or hedge. With all that said if the site is sloping or private a deck can be a great focal point and a wonderful addition to the garden.
When you’re planning the position of the deck think about how you will use it. A sun deck might want to be sited with a clear southerly aspect, a deck for entertainment take advantage of evening sun so a westerly aspect would be favourable. If you’re not sure about shade and position there’s a really good resource that will allow you to determine the position and size of shadows cast by buildings and objects such as trees called shadowcalculator.eu.

MATERIAL SELECTION
The three main categories of decking boards are Softwood, Hardwood and Composite.
Softwoods are lumber harvested from Gymnosperm trees such as pines and conifers. Since softwoods are fast growing and abundant they are by far the cheapest option. Pressure treated redwood is most common locally in Cumbria and fine to use when correctly installed and maintained . Problems occur when the deck is badly built or doesn’t have the correct board spacing. Wood needs to breathe so it shouldn’t be close boarded and note that timber expands when wet so allow for this when setting the board spacing .To prolong the lifespan of a softwood deck it must be cleaned regularly and treated with preservative especially if the site is shady.
Hardwood comes from Angiosperm (broad leaf) trees. In temperate climates woods such as Oak and Ash are hardwoods, tropical climates yield mahogany, Teak, Ipe etc. These woods are much slower growing, scarce and the tropical species imported making them an a expensive choice. They withstand the elements better than softwood and are more durable but are not without their problems. Hardwoods are more difficult to install because they are extremely tough, the boards need to be pilot-drilled and even then occasionally screws will shear off as you drive them. Being timber – if neglected they can become incredibly slippery and of course there’s the subject of sustainability; hardwoods from tropical regions may or may not have been sourced ecologically. If you are willing to keep it clean and respect it as a natural product – perhaps treating with algicide then yes, by all means use hardwood. If you live in the Californian sunshine I’m sure algae won’t be an issue and you can rest easy, Carlisle however…
Composite is the material of the moment. Composite decking is a mixture of recycled plastics and filler material – sawdust or timber particles heated and compressed with a binding agent. The surface on the better quality boards has a veneer of film added to provide a moisture barrier and to give a decorative finish, it looks premium and comes in a wide range of colours and textures. Composite boards are almost maintenance free, non-slip and each manufacturer offers a hidden fastener system. I usually suggest composite for decking in Cumbria because of the disadvantages of soft and hardwood surfaces particularly when they aren’t well-maintained.
STEP BY STEP DECKING BUILD IN CUMBRIA
Here’s a little walk through of the decking build process, it’s not meant to be a thorough guide but should give you the general idea.
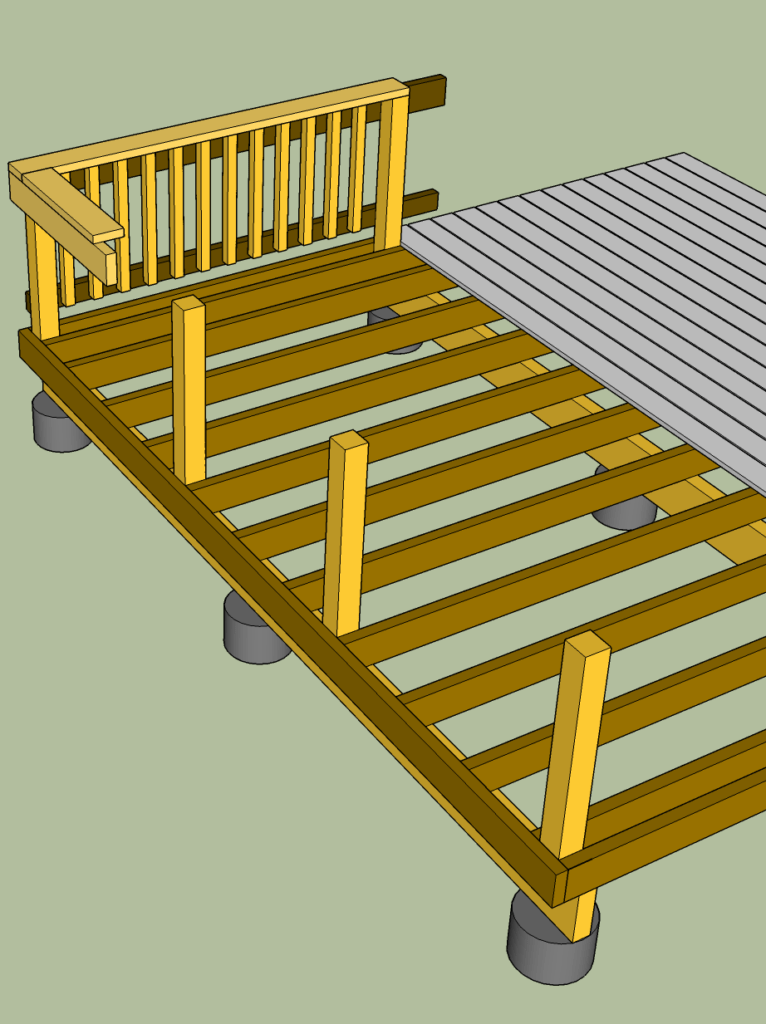
FRAME OVERVIEW
Footings should be placed at appropriate intervals. Ideally you’l determine the bearing capacity of your soil or subsoil, the imposed load (the sum of the weights of the combined material elements, allowances for furniture, number of users and other imposed loads) and use those figures to calculate your footing area etc. The bearing capacity of a 300mm diameter foundation on firm clay is in the region of 3000kg in contrast to soil which is about a third of that, so dig down to firm clay. 300mm footings at 2.4m centres should be adequate for a light domestic deck but do your own calcs.
The frame itself should be PT timber – I use kiln dried C16 or above. You should really check span tables for joist spacing and spans. An example would be 225×47 at 400mm centres on 75x225beams for a very robust deck but you can certainly use lighter timbers than these.
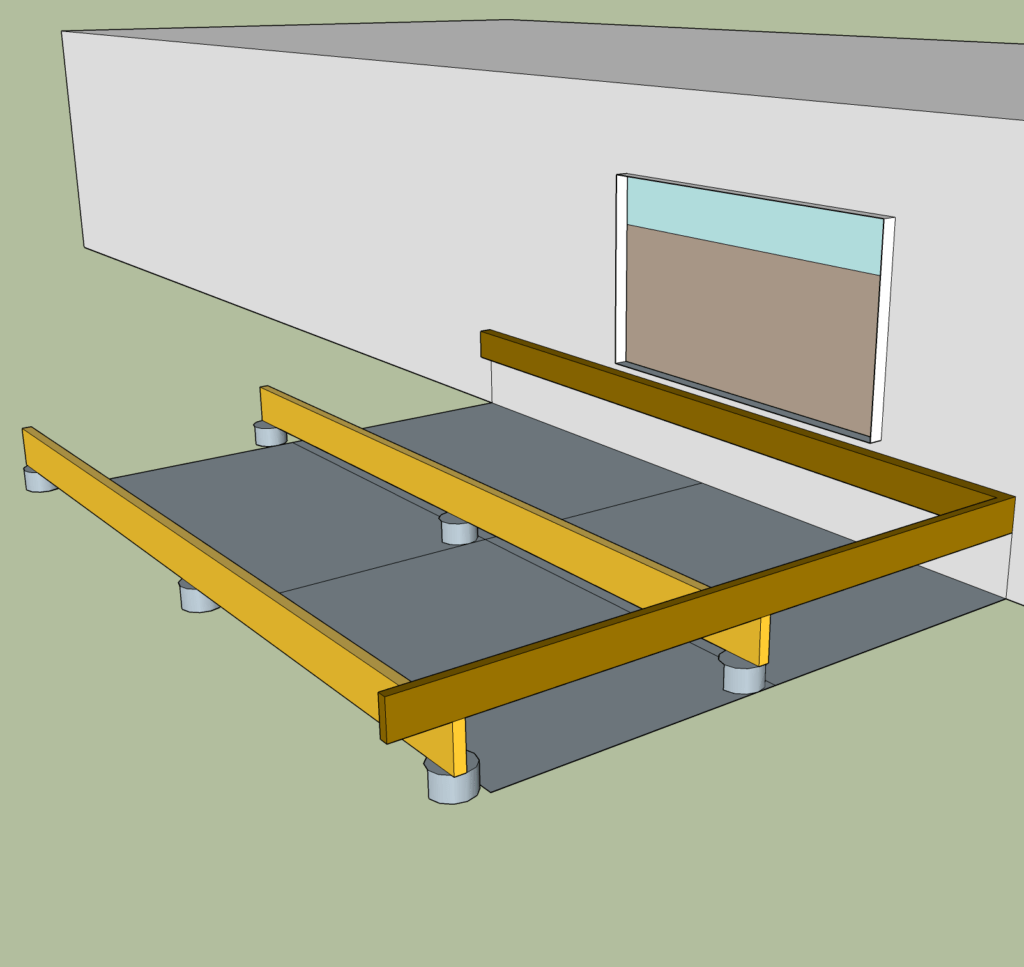
Lean to decks should comprise a ledger plate fixed to the wall below DPC using suitable fixings. I like M12mm wall anchors spaced at 600mm centres. I’ve heard of people offsetting the ledger using spacers for damp mitigation but since we’re below dpc I think it unnecessary – If you have a good argument for why please get in touch.
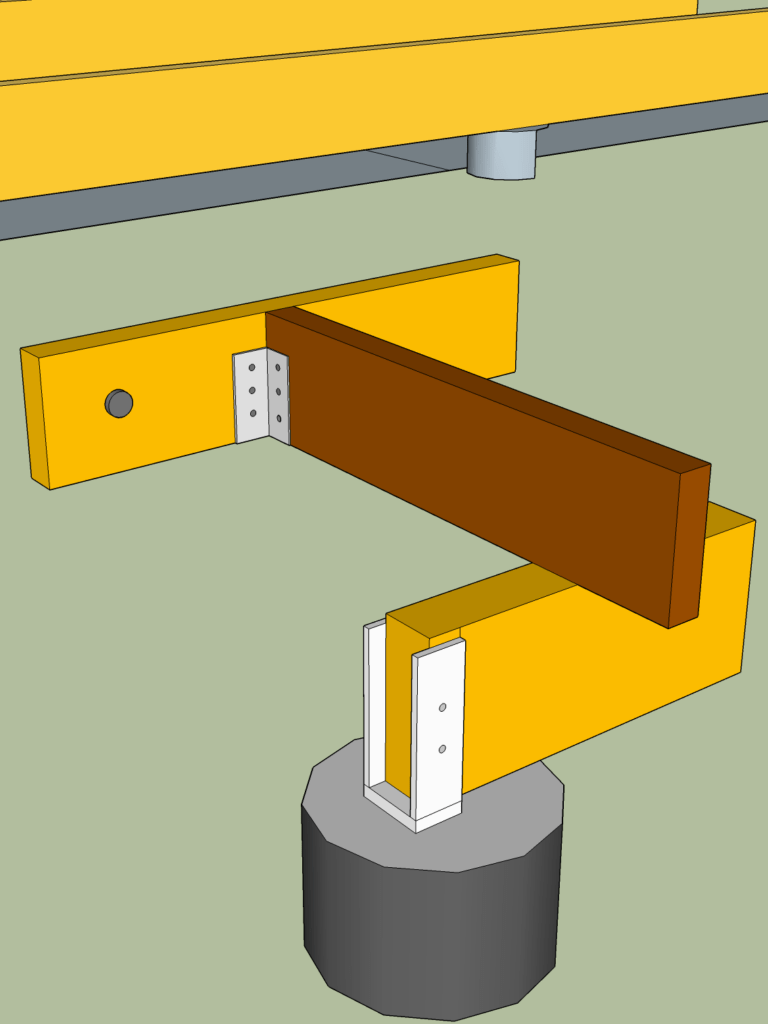
FRAME DETAILS
I’ve included a little detail of a mass concrete footing, glavanised U brackets holding the beam with joists fixed to the ledger using joist hangers. It’s a simple system but its far better than concreting posts into the ground, it’s more accurate and two men can easily have the footings set in a morning.
PLANNING THE DECK BUILD
1) Check the site is suitable, can the area accommodate the frame depth? Include for clearance to the damp proof course, add the thickness of the board, the depth of framing joists and the depth of any support beams.
2) Design your deck frame . What spacing will you need to place the joists? How many joists will you need? How many fixings? What layout will you use? Remember the boards will need to run perpendicular to the joists and the joists perpendicular to the support beams. Support beams parallel to the side of the house are easier to install, you’ll need fewer footings and you will be able to fix part of the deck frame directly to the house wall.
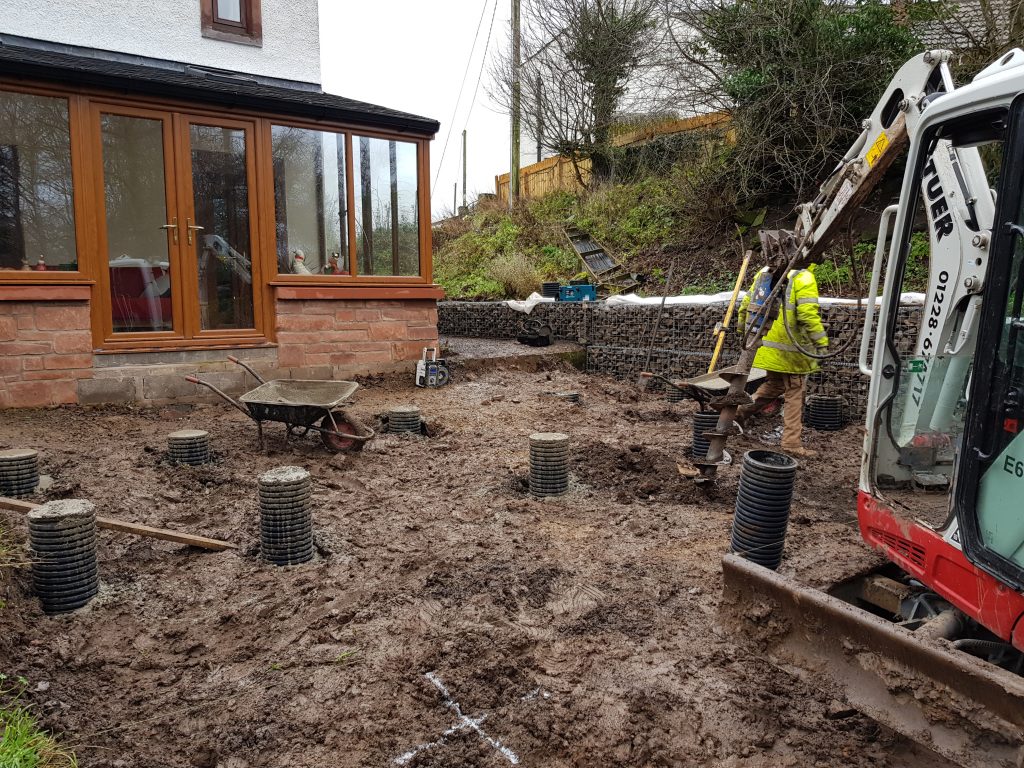
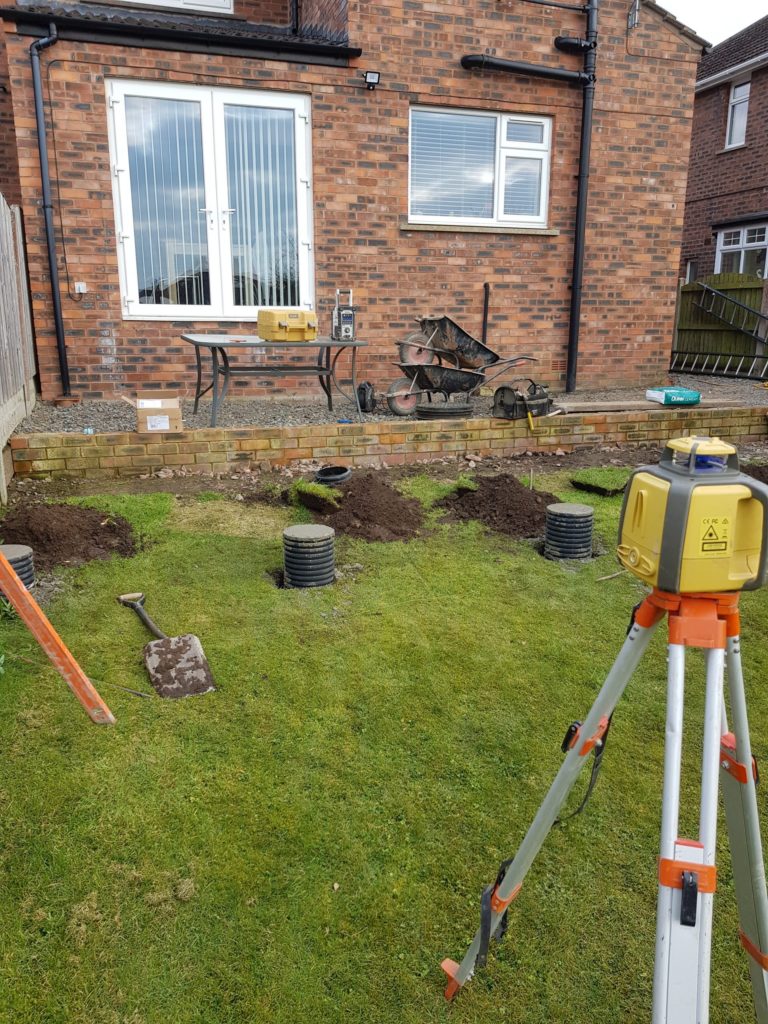
FOOTINGS
3) Set out your plan and dig your footings. You can calculate the spacing of your footings using tabulated data known as span tables, here’s a link to the NHBC span tables. We dig our footings to a minimum of 600mm, but try to go deep enough to find a stable strata (not top soil), firm clay makes a good base. Frost heave isn’t an issue below 300mm in the UK but in some parts of the world frost heave is a major issue, check with your local building control if you’re not sure.
4) Pour your footings. In North America they use cardboard form tubes, I’ve yet to find any available in the UK ( if you know where to get them email me) so use 300mm twin wall drainage pipe. It comes in 6m lengths and is easy to cut with a hand saw. Set the twin-wall into the footing hole and set vertical position using a string line or your laser level.
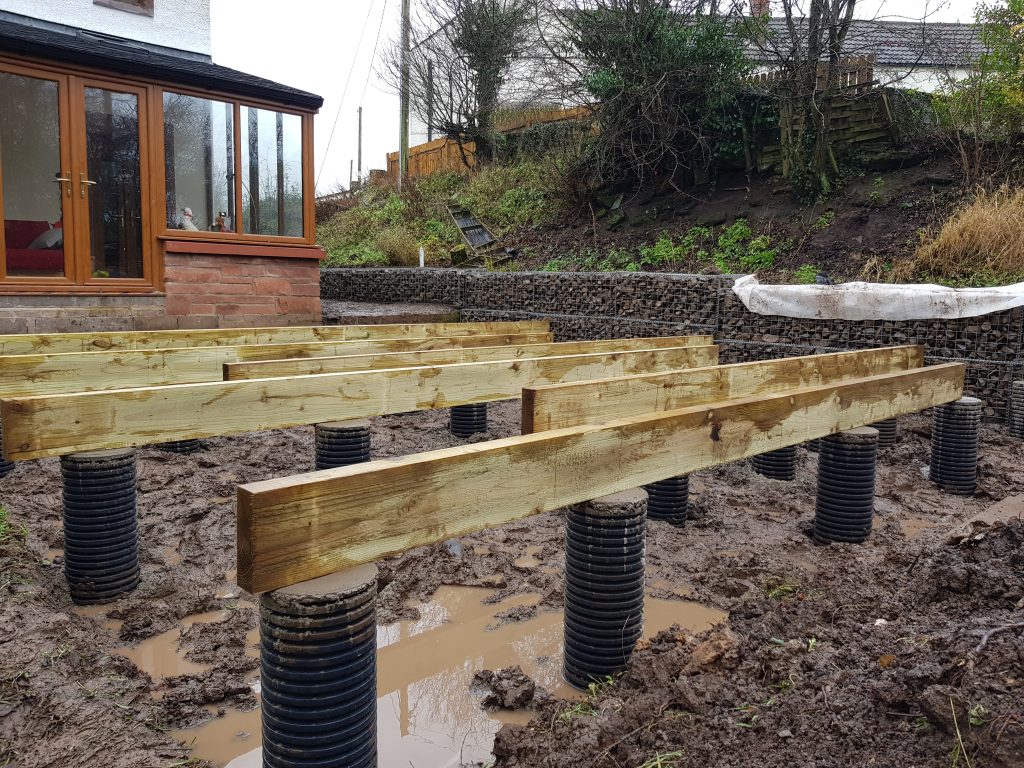
5) Insert the galvanised shoes to hold the beam and align using a string-line. If you can’t get hold of galvanised shoes you can let the beam rest on the concrete column, if you do this place a little damp proof membrane beneath the beam to help prevent rot and use galvanised brackets to fix the beams to the columns – you don’t want your deck blowing away!
FRAMING
6) Wait a few days for the concrete to cure and set your beams, Minor adjustments can be made using plastic spacers the aim is to align the tops of the beams ready for the joists.
7) Grade your joists. If for example you’re using 10×2′ (247x47mm) they will not all be the same size. Measure them and lay them out according to thickness, some will be as low as 244mm or as high as 250mm. Some will be wildly out of straight or particularly out of dimension, mark all the joists with their dimension and put an X on any stinkers. If you sort them now it will save a lot of swearing later.
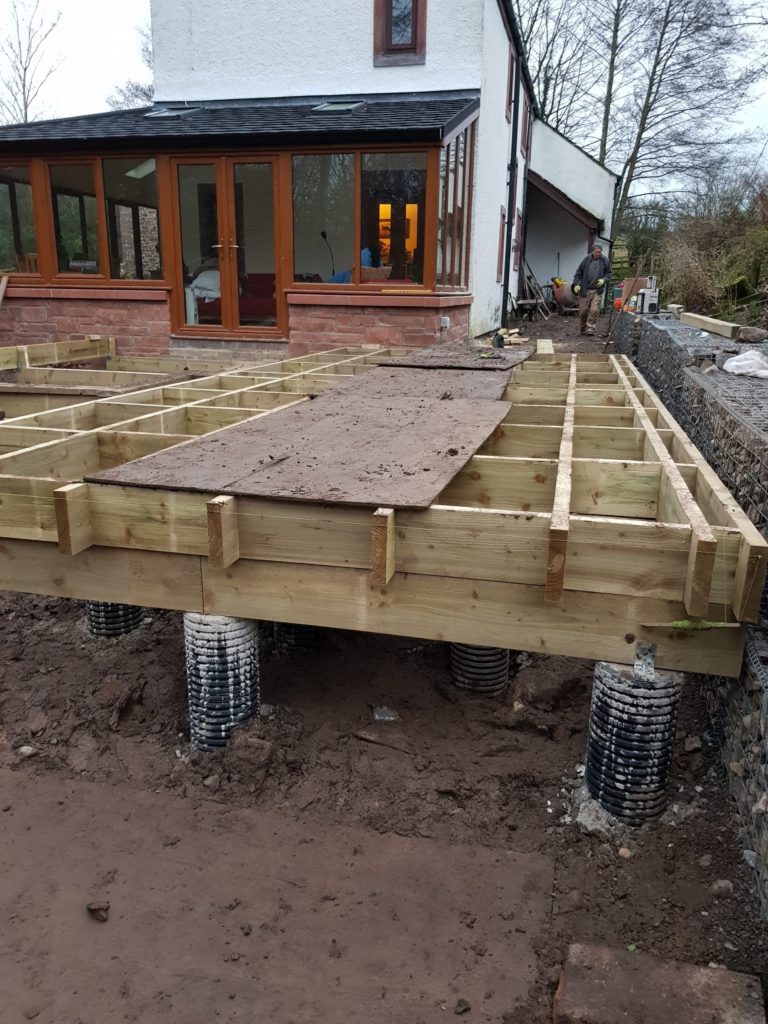
8) layout your joist on the beams in size order and with the crown up. Wood is rarely straight so put the arch to the top because as the wood is loaded the joist will flex back down towards straight. Check with the deck board manufacturer for spacing, 400mm centres is about right in most cases. If you’re going to picture frame your deck you’ll want to double up the joists on the free sides.
9) Noggins! Cut noggins and nail them between the joist to stiffen the structure. Cut them from the joists you marked with an X. Use a saw stop so they’re all the same length and you’ll maintain your joist spacing. Hopefully you’ve got a nail gun…
10) Tape the top of your joists with waterproof tape, if you can’t get hold of it use a bitumen paint like Blackjack, this will help prolong the lifespan of your deck.
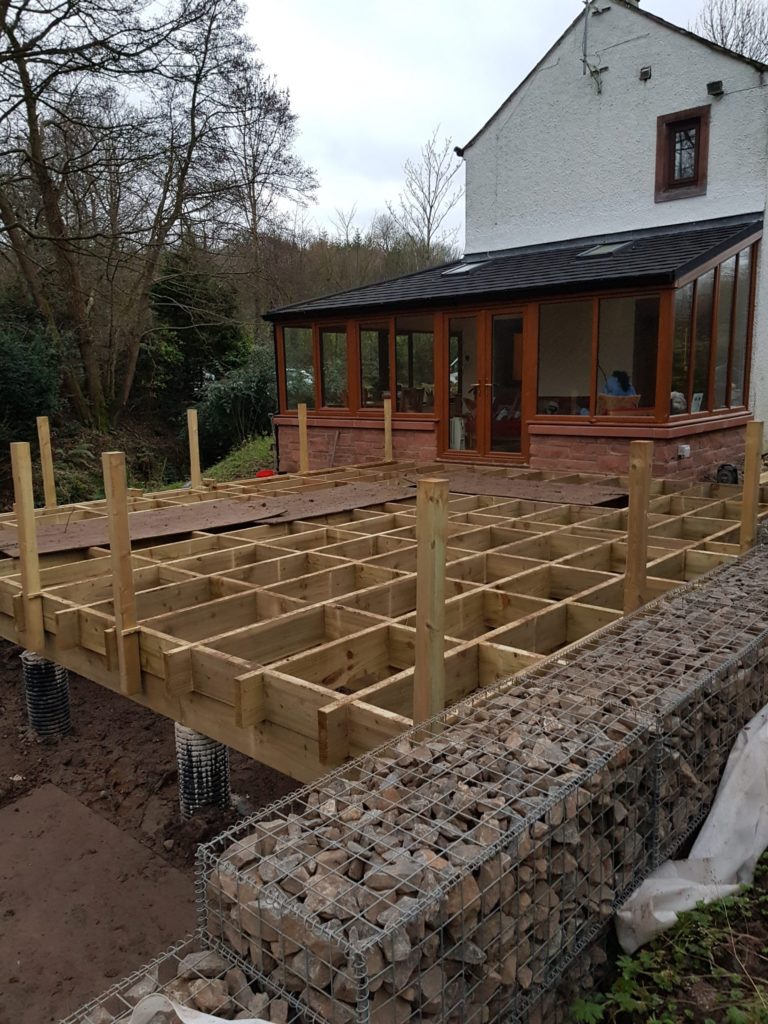
NEWELS
11) Install your newel posts, the posts can be adjusted for plumb with wedges. Install all the newels first then plumb them one at a time. If you’re enclosing the side of the deck with boards or screens you need to use extra long newels or place vertical timbers to fix to, it’s easier to do this before you board the deck.
FITTING DECK BOARDS
12) If you’re picture framing the deck you’ll want to leave the first boards along the house side unfixed so that you can trim them to length for the picture frame detail. Fix each subsequent board and check for straightness periodically. Leave a 3mm clearance gap where board ends meet to allow for expansion. Trim the ends after installation using a circular saw and straight edge to give a straight finish then fit your picture frame boards. Some people like to mitre the corners, it’s up to you but if the boards are susceptible to cupping you might end up with problems later.
TIPS FOR A SUCCESSFUL DECK BUILD
Joist sizing for clear spans can be determined using span tables.
After you have framed the deck check and adjust for high spots, pack as required. Some crowning will settle once the deck is loaded.
Wood is flexible, have a walk around on it and pack up any flexing joists using plastic frame spacers.
Newel posts can be set at their correct heights using blocks of lath tacked to their side at the correct clearance. Use two and they will stand upright on a corner allowing a trial fit for you to eye in and adjust before committing. Adjust for plumb using wedges.
Use the best quality fasteners you can get, your driver will shred the tops of cheap screws, same applies to driver bits – change them often. Torx or Robertson screws (square drive from Canada ay!) are nice to use. Pz1’s ? No bueno.
Trim the free ends of the joists after you have fitted the second last board, you’ll find it easier to trim them all to length to suit you board spacing and you’ll avoid ripping a board down it’s length to fit the frame.
Many composite deck boards have longitudinal holes, consider this when you plan your layout – cut ends look ugly.
Get some plywood sheets, walking around on a deck frame is fun for the first ten minutes only, make a working platform using sheets and move it along as you go.
Frequently asked questions
Composite decking has a lifespan of up to 25 years.
Timber decking has a lifespan of up to 15 years but can last longer if well maintained.
No, timber decks are constructed using pressure treated timber that requires no painting, composite decking requires no surface treatment.
Composite decking is non-slip, doesn’t rot and comes in a range of attractive colours and finishes.
Absolutely, if there’s room for the support frame then decking can be a great way to transform an old patio into an attractive area.